F

Fitness & Training Feed

Workout programs and gym content

Don't miss new videos — get them as they're added

Get new videos
1 videos added this week2.6k subscribers225 topics
5 Bodyweight Exercises That Fix 95% of Your Problems

5 Bodyweight Exercises That Fix 95% of Your Problems

22 Days to More Pullups - https://athleanx.com/morepullups Subscribe to this channel here - http://bit.ly/2b0coMW If you are looking for 5 exercises that fix 95% of your problems, then you’ve come to the right place. In this video, I am going to show you 5 different exercises that will help to deal with the common problem areas in the body as well as working on those stiff and achey joints so you can feel loose and pain free throughout the day. The first exercise up a pushup variation done to target very specific problem areas. If you have bad posture, rounded, tight, achey shoulders and low back problems, this hand-release superman pushup will address those areas immediately. By extending the arms straight out in front, you are promoting overhead shoulder biomechanics and thoracic extension. When it comes to bad posture, we often have trouble getting our arms overhead, especially due to rounding of the thoracic spine. If we can get thoracic extension, we can promote good posture. It's important to note that we often neglect the muscles on the backside of our body, which leads to weakness which then leads to poor posture and biomechanics. When it comes to addressing the lower back, we often have a weakness in the lumbar spine area. We focus most of our efforts on building size and strength of the lats, but the muscles of the lower back, when weak, can become painful. By lifting our legs off the ground in this superman pushup, we are directly strengthening the muscles of the low back. The second exercise that will fix 95% of your body's problems is a combination between one of my favorite mobility exercises and one of my favorite ab exercises. The bridge and reach over will again promote thoracic mobility, helping to alleviate some of the postural problems you may have. On top of that, though, this part of the combo will also help to strengthen the glutes. Weak glutes often contributes to dysfunction like anterior pelvic tilt and low back pain. Therefore, if we can strengthen the glutes while working on the posture of our upper body, we will be setting ourselves up for postural success and a life without chronic pain. The second half of this combo features the heels to the heaven exercise or swiper. Swiping your hands underneath your low back while you perform this exercise will give immediate feedback that you are doing the movement correctly. If you can't swipe your hands underneath, you are not getting your pelvis off the ground. This means that you are likely using your hip flexors instead of your lower abs to initiate the movement. The third exercise that you should be doing in an effort to fix 95% of your problems is another combination that mashes up a bodyweight squat and static reverse creeping lunge. Here we will again address thoracic extension as you will need to stay as upright as possible during the entire movement. This can be reinforced by folding your hands and holding them against your sternum - your knuckles should be facing the ceiling at all times. Squat down and pause, from here, step back one leg into a reverse lunge, return and step back the other leg. This combo is extremely effective at targeting hip stability because of the unilateral nature of the lunge portion of the exercise. Stronger hips will lead to better balance as well as preventing back pain. Most sources of low back pain don't come from your back directly, but weakness in the muscles of the hips like the glute medius. The next exercise is a home variation on one of my favorite exercises that I find to be extremely beneficial when it comes to training the upper body and correcting any deficiencies we may have. The doorway facepull. Simply press against the door frame with the back of your hands and pull your upper body forward until you feel the muscles in your upper back and rear delts engaging. This exercise will strengthen the muscles of the upper back that often get neglected, along with the rear delts and the rotator cuff (thanks to the external rotation present within the exercises form itself). This might be one of the most effective exercises for correcting posture and promoting shoulder health and there is a reason that I continue to program the gym and home version of this exercise whenever I can. Be sure to watch the video to the very end to see the final exercise that will help fix 95% of your problems. If you are looking for a complete workout routine and meal plan to compliment your flexibility and mobility routine, be sure to head to athleanx.com and check out the program selector tool. It will take you just minutes to find the exact plan that fits your current goals and will help you to build ripped athletic muscle quickly. For more home stretching routines and the best stretches for your hips, back and shoulders be sure to subscribe to our channel here on youtube via the link above and remember to turn on your notifications so you never miss a new video when it’s published.

5 days ago·youtube.com
+49
Your Chest Won’t Grow Until You Fix THIS

Your Chest Won’t Grow Until You Fix THIS

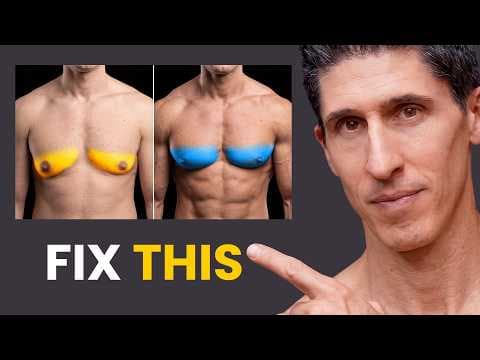
Build a Muscular Chest Here - https://athleanx.com Subscribe to This Channel Here - https://bit.ly/2b0coMW If your chest won’t grow no matter how much you bench press, this video explains the REAL reason your pecs may not be responding and what you can do to finally build a bigger chest. I’m breaking down chest growth, pec activation, bench press technique, chest genetics, dips, pushups, cable presses, fly variations and the mistakes that can keep your shoulders doing the work instead of your chest. A lot of guys assume a lagging chest simply needs more weight, more exercises or more volume. But if you’ve been consistently bench pressing for a long time and your pecs still aren’t growing, the problem may not be effort. It may be that your chest is never becoming the dominant muscle in the exercises you’re using. The bench press should absolutely be a foundational chest exercise. If you haven’t been bench pressing consistently for at least a year, you may simply need more time building strength and improving your technique. For many lifters, the anterior delts and triceps dominate pressing movements. You may be moving impressive weight without creating enough tension in the pecs. That’s why chest adduction exercises can be so important. Exercises that bring the arm across the body can help you learn how to contract the pecs more effectively and carry that chest activation into your pressing exercises. Cable crossovers and cable flys are great options. If you don’t have a cable machine, a dumbbell floor fly can be a useful alternative. I prefer the floor fly to a traditional dumbbell bench fly because the floor limits the bottom range and can reduce the vulnerable position of the shoulder. But activation is only part of the story. At some point, chest genetics and skeletal structure matter too. The width and length of your clavicles and your overall frame influence how much total muscle mass your chest can visually carry. That doesn’t mean you should blame genetics. Different lifters simply have different ceilings and chest shapes. The goal is to maximize YOUR pec development by building the lower chest line, improving thickness through the middle pecs and developing the upper chest so you create that fuller shelf near the clavicles. You do this by training the chest with intent instead of treating every chest exercise like a strength test. One major change is to separate strength training from hypertrophy focused chest training. Let the barbell bench press be a strength exercise if that’s where you perform best. Then use other chest exercises with lighter weights, slower reps and more control to make the pecs do the work. On a dumbbell bench press, try pausing at the bottom of each rep. Keep the shoulders back and think about initiating the press with the chest instead of simply driving the dumbbells upward. That brief pause can help eliminate momentum and force you to create tension with the muscle you’re trying to grow. The same idea applies to dips. Dips can be an excellent lower chest exercise, but only if you perform them correctly. If your shoulders roll forward as you press up, you may be shifting stress away from the pecs while putting the shoulders in a less favorable position. Slow the movement down, maintain control and initiate the rep with the chest. Another excellent option is the cable bench press. This doesn’t replace the regular bench press. Instead, the cables pull slightly outward, forcing the pecs to contribute more strongly through their adduction function. For someone who struggles to feel their chest, this can be a game changer. And if you train at home with no equipment, you can still improve chest activation with pushups. Slow the pushup down. Don’t just think about pushing your body away from the floor. Think about lifting your sternum as you press and squeezing the pecs to move your torso upward. That can make a pushup feel completely different. If your chest won’t grow, don’t automatically assume you need more weight, more sets or more exercises. First make sure your pecs are contributing the way they should. Improve your mind-muscle connection, control the eccentric, slow down your reps, use exercises that reinforce horizontal adduction and stop letting the shoulders dominate every press. If you’re looking to build a bigger chest, increase pec activation, improve your bench press technique, grow your upper chest, build your lower chest or finally fix a stubborn chest that refuses to grow, these principles will give you a much better path forward. For complete ATHLEAN-X training programs designed to build muscle and increase strength, visit athleanx.com at the link above. If your LOWER CHEST is the problem, watch the Lower Chest Solution next. If your UPPER CHEST won’t grow, watch the Upper Chest Solution next. Subscribe to ATHLEAN-X and turn on notifications so you never miss a new video.

1 week ago·youtube.com
+32
If You Love Eating But Want Abs, Do This For 30 Days

If You Love Eating But Want Abs, Do This For 30 Days

TRY 2 WEEKS FREE OF MY TRAINING AND NUTRITION APP HERE: https://bws.plus/23a DOWNLOAD THE FREE 30 DAY GUIDE HERE: http://builtwithscience.com/fillingdiet What if you could lose fat while eating huge meals, never counting calories, and rarely feeling hungry? To test that, I built the world's most filling diet: a volume eating plan that swaps calorie dense foods for high volume low calorie meals and low calorie foods big enough to keep you full in a calorie deficit. It's a meal plan to lose fat, full of fat loss meals that make fat loss easy. Two experienced lifters followed it for 30 days. Manson started at 24.7% body fat and Melody at 32.5%. They followed three rules: three meals a day from an oversized bowl; at least one lean protein, one high-volume food, and one measured serving of fat per meal, with no snacks; and fill the bowl to the top. Fats were capped because they are calorie dense foods that pack far more calories into less space. The foods were picked to give a lot of food for few calories. This is the logic behind volume eating: 200 calories of shrimp is far more food than 200 calories of steak, and low-calorie produce makes even bigger portions than trail mix, rice, or pasta. As the stomach fills, stretch receptors in its walls respond to the expansion and signal fullness. The same stretch principle drives gastric bypass surgery, which averages 12 to 18 pounds of fat loss in the first three months; my theory was that creating a similar fullness effect through food volume might produce a comparable rate of fat loss without surgery. The first week showed how differently they approached the same plan: Manson chased convenience, repeating strawberries, shrimp, and eggs while barely touching vegetables, whereas Melody kept experimenting with new meals. After one week both were down about three pounds - early proof the calorie deficit was working. To push fullness further, I added three more strategies. The first was carbonation: with every meal they drank a diet soda or other carbonated drink. Research comparing carbonated water with still water found carbonation produced a bigger rise in fullness that lasted almost an hour. Manson said it helped his cravings; Melody just found her meals harder to finish. By Day 15, Manson was down six pounds and Melody five. Manson worried the fast loss might cost him muscle. Every meal had lean protein and both kept training progressively; their strength was rising - encouraging, but only the final scans could confirm muscle was preserved. The second strategy was broth: one meal a day included roughly one to two cups, before the meal or as soup. In one study, people ate about 20% fewer calories when they started with a low-calorie soup. Combined with carbonation, these high volume low calorie meals stayed under roughly 500 calories. Then the scale stalled. With high-sodium broth daily, my theory was that temporary water retention was masking continued fat loss - and a week later the bump reversed. By around Day 20, a bigger issue emerged: fullness and enjoyment aren't the same. Manson was sick of the same foods and craving beef, rice, and fried chicken, while Melody's variety made the plan easier to tolerate, though cravings, family meals, and barbecues still tested her. The final strategy was eating more slowly with a tiny fork and spoon. More bites meant longer meals, the idea being that more time eating leaves you fuller and more satisfied. Both found it frustrating, but Manson ended up dropping from three meals to two because he couldn't finish all the food. By the end, Melody was rarely hungry and could see her upper abs, and Manson was seeing clear changes too. Both named shrimp a top food; Manson's top strategy was the small utensils, Melody's the carbonated drinks. The final DEXA scans told the story. Melody lost just over eight pounds, almost all fat, dropping from 32.5% to 29.7% body fat. Manson lost 10.4 pounds, 10.2 of it fat, dropping from 24.7% to 20.7%. Neither lost muscle. For these two, huge portions of low calorie foods produced substantial fat loss while making hunger almost irrelevant. But killing hunger didn't kill the other challenges of dieting: monotony, cravings, convenience, social situations, and food variety still mattered. 0:00 - 3:15 : The Diet Rules 3:16 - 6:08 - Week 1 & Recipes 6:09 - 10:28 - Week 2 10:29 - 14:30 - Week 3 14:31 - 17:20 - Week 4 17:21 : Final Results Click below to subscribe for more videos: https://www.youtube.com/jeremyethier/?sub_confirmation=1 Disclaimers: Jeremy Ethier is not a doctor, physical therapist, or a medical professional. Always consult a physician before starting any exercise program. Use of this information is strictly at your own risk. Jeremy Ethier will not assume any liability for direct or indirect losses or damages that may result from the use of information contained in this video including but not limited to economic loss, injury, illness or death.

1 week ago·youtube.com
+48
If Your Shoulder Hurts, FIX These 7 Exercises Now!

If Your Shoulder Hurts, FIX These 7 Exercises Now!

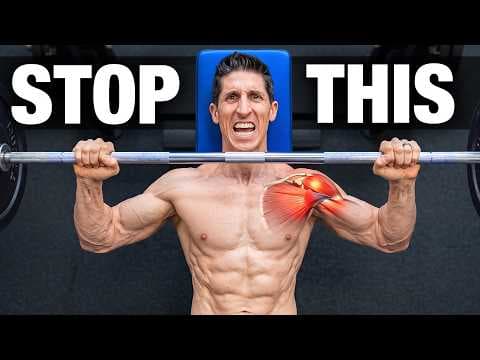
Train Without Pain Here - https://athleanx.com Subscribe to This Channel Here - https://bit.ly/2b0coMW If you have any kind of a shoulder pain, you're probably looking for the 7 most troublesome exercises for a bum shoulder. In this video, I am going to go over what those 7 troublesome exercises are if you are dealing with a bad shoulder (or shoulders for that manner). Not only that, but I am going to show you how to manage those exercises so that you can keep training and getting gains without the pains. When it comes to working out with shoulder pain, I know that there are 7 exercises that are troublesome. Does that mean you should stop doing them altogether? Or is there something that can be done to mitigate the pain while still getting the benefits of the exercise? As a physical therapist and someone that has bad shoulders myself, I can tell you that avoiding these exercises altogether is not the solution. The first exercise that could be a problem with shoulder pain is one you might not immediately think of and that's the pullup. In the case of a labrum tear, this can be one of the most aggravating exercises. The fix here is to depress your shoulders - create distance between your ears and your biceps as you hang from the bar. When you are lowering yourself down from the top of the pull-up, there are 2 things you need to do. The first is to slow yourself down as you descend. The second is to never disengage the packing of your shoulders throughout the rep. This will let you keep getting the benefits of the pullup without aggravating a compromised labrum. The next troublesome exercise for a bum shoulder is an obvious one that, again, you shouldn't be skipping. That is the bench press. Most people experience shoulder pain or shoulder discomfort on the bench press when they use a barbell. That is because of the fixed arm position of the arms when using the bar. If you are going to use a barbell to bench press, then you will want to take a more narrow grip. This will help with elbow positioning in preventing you from flaring your arms out to the sides (incurring greater internal rotation) as well as activating the lats to stabilize the press. In many cases, I would say that if a barbell bench press is causing shoulder pain, then you're likely better off switching to dumbbells. This will allow freedom to tuck the elbows as much as needed to avoid shoulder pain. The key here is to go slow to create greater stability. If there is one exercise you should skip altogether when it comes to working out with shoulder pain, it would be the upright row. It's just not a good exercise due to its ability to create shoulder problems in the first place (such as with impingement) and any benefits it has when it comes to shoulder growth can be mirrored by another, safer exercise. In this instance, simply opt to perform a dumbbell high pull instead. The added benefit of external rotation at the top of the rep will help prevent impingement and promote healthy shoulder mechanics. We don't only have to focus on the upper body to find exercises that will be tough on a creaky shoulder. As a matter of fact, the king of leg exercises, the squat, can be a big problem if you don't have the right shoulder mobility. I'm specifically talking about the low bar squat, which requires a lot of shoulder external rotation to get into the proper position. However, we have some simple fixes so you can still squat without pain. If low bar squatting is what you want to do, try a wider grip for less shoulder mobility demand. Otherwise, you can switch to a high bar squat or a front squat, which will still have a heavy impact on your leg growth. Now, I've heard time and time again that if you have bad shoulders, you shouldn't do dips. I disagree. I think you just need to pay attention to how you are performing the exercise. The first thing to take note of is that you should be taking the same tip from the pullups when it comes to depressing your shoulder blades - keep your shoulders back and down throughout the entire movement. On top of that, stick your chest out. A proud chest will make sure your chest is taking the brunt of the work instead of the shoulders. Don't think you need some extreme amount of stretch at the bottom of the rep either. Cut your depth a little short to where you are getting some stretch on the pecs without aggravating your shoulder pain. Finish watching the video to the very end to see the rest of the 7 most troublesome exercises for a bum shoulder. If you're looking for a complete workout program designed to help you build muscle without pain or injury, visit athleanx.com. Every ATHLEAN-X program has been designed by a licensed physical therapist to ensure safety in the process of meeting your fitness goals. For more videos on working out with injuries, injury prevention, and injury rehab; be sure to subscribe to the ATHLEAN-X YouTube channel and turn on notifications so you never miss a new video.

2 weeks ago·youtube.com
+33
How I’d Get "6 Pack Abs" If I Were Starting All Over Today

How I’d Get "6 Pack Abs" If I Were Starting All Over Today

Get a Flat Stomach Here - https://athleanx.com/flatstomach Carbs List Here - https://athleanx.com/carbs Subscribe to This Channel Here - https://bit.ly/2b0coMW If you want to get 6 pack abs, there are a few things you need to get right. In this video, I’m breaking down 13 of my best tips for getting six pack abs by combining smarter nutrition, better ab workouts, and more effective exercise technique. You cannot build a visible, ripped six pack by focusing on ab exercises alone. You need to train the muscles correctly while also lowering body fat through a sustainable nutrition plan. The first tip starts where your day begins. After going several hours without water while you sleep, you may wake up mildly dehydrated. Drinking 16 to 20 ounces of water shortly after waking can help you rehydrate before training, eating, or starting the rest of your day. Proper hydration supports exercise performance, energy, and the quality of your ab workouts. Whether your goal is to lose belly fat or perform better in the gym, staying hydrated matters. Next, pay attention to the order of your ab exercises. Start with lower ab exercises that require you to move the legs or pelvis. These movements are often more demanding and require greater control. Save top-down movements, such as crunch variations, for later in the workout. This lets you perform the hardest exercises while your abs are fresh and your form is still strong. When it comes to nutrition for six pack abs, use a simple plate strategy to control portions without counting every calorie. Imagine your plate as a clock. Fill the largest portion with fibrous carbohydrates such as vegetables. Fill the next largest portion with a quality source of protein. Use the smallest section for starchy carbohydrates, then include a modest amount of dietary fat. This makes it easier to build balanced meals and stay consistent with your fat loss goals. For a complete list of better carbohydrate choices, visit https://athleanx.com/carbs. During your ab workouts, stop focusing only on how many reps you complete. Make every repetition count. A fast, careless rep that creates little tension in the abs should not count the same as a controlled contraction. Slow the movement down and focus on feeling the abdominal muscles do the work. Quality contractions will do more for building defined abs than racing through sloppy repetitions. On lower ab exercises, think about lifting the pelvis rather than simply lifting the legs. Moving the legs without curling the pelvis can allow the hip flexors to take over. When possible, squeeze the knees together to engage the adductors. This can improve pelvic stability and create a stronger contraction in the lower abs. For upper ab exercises, imagine a line running across the bottom of your ribcage. Try to fold your torso over that line. Focus on lifting the shoulder blades off the floor by contracting the abs instead of pulling on your head or neck. This can make top-down ab exercises safer and more effective. Your diet can also include a few simple additions that may support fat loss when used consistently. Green tea, cinnamon, and red pepper flakes are easy additions. I personally use Ceylon cinnamon in oatmeal and red pepper flakes in different foods throughout the day. None of these will give you abs by themselves, but small habits can support a stronger nutrition plan when combined with training, calorie control, and consistency. Breathing is another important part of ab training. If you push your abdomen outward every time you exhale, you may reinforce a distended appearance through the midsection. Instead, tighten the waist by engaging the transverse abdominis as you breathe out. Think about drawing the abdomen inward while maintaining control of the movement. With practice, this can become automatic and improve your control of the core. The rest of the 13 tips for getting 6 pack abs are covered in the video. Watch the full breakdown and let me know which tip helped you most. Getting abs is not about finding one magical exercise or following an extreme diet. It comes from combining effective ab workouts, better technique, proper hydration, smart food choices, portion control, and a plan you can follow long enough to see results. The goal is not simply to lose weight. It is to reduce body fat while building strong, visible abdominal muscles. If you are looking for a complete meal plan and workout program designed to help you get six pack abs while building ripped athletic muscle, visit athleanx.com using the link above. Every ATHLEAN-X program includes training and nutrition guidance to remove the guesswork and keep you progressing. For more videos on how to get abs, the best ab exercises, effective ab workouts, and more; be sure to subscribe to the ATHLEAN-X YouTube channel and turn on notifications so you never miss a new video.

3 weeks ago·youtube.com
+46
Stop F*cking Up Lunges (SAVE A FRIEND!)

Stop F*cking Up Lunges (SAVE A FRIEND!)

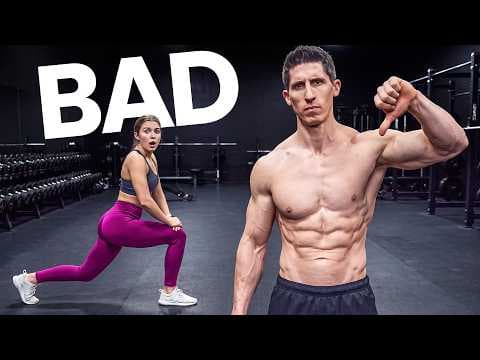
FREE Total Body Program Here - http://athleanx.com/tbfree Subscribe to this channel here - http://bit.ly/2b0coMW The lunge is one of the top leg exercises you can include in your workouts, but it is also one of the exercises I see performed incorrectly every day. In this video, I am going to show you how to do lunges with proper form to build bigger quads, glutes, and hamstrings without unnecessarily beating up your knees. It is not just which exercises you do, but how you do them that matters most. Step 1 of this lunge tutorial is choosing the right direction: Most people automatically step forward when performing lunges. The problem is that the forward lunge can place more stress on the knee because the lead leg leaves the ground and has to absorb force when the foot lands. If your knees are irritated or you cannot control the landing, this can turn a great leg exercise into a painful one. The reverse lunge is often the better option. By stepping backward, the working leg stays planted throughout the rep. This lets you control the movement while avoiding the abrupt loading that occurs when stepping forward. You still train the quads, glutes, and hamstrings, but with mechanics that are more comfortable and repeatable. If you prefer forward lunges, consider walking lunges. Instead of stepping forward and then pushing backward, continue into the next rep. This improves the movement pattern, though it does not completely remove the extra stress when the lead foot hits the ground. Step 2 of this lunge form guide is getting your foot placement right: One of the most common lunge mistakes is stepping as though you are walking on a tightrope. When both feet remain directly in line, balance becomes the main challenge instead of building your legs. Step back and slightly out to create a wider base of support. To determine how far back to step, reach with the toe of the back foot. Once the toe contacts the ground, stop moving backward and lower straight down. This creates a repeatable setup based on your leg length while keeping the hips stable. Step 3 of this reverse lunge tutorial is stabilizing the hips: As you step backward, rotate your shoulders slightly toward the front working leg. This subtle turn helps lock the pelvis into position and limits wobbling at the hip. A small turn is enough to improve stability so you can focus on training the legs rather than fighting for balance. Step 4 of this lunge how-to is choosing which muscles you want to target: The angle of your torso changes the emphasis of the exercise. Keep your torso upright during a reverse lunge to place more focus on the quads. Maintain a tall posture, drop straight down, drive through the front foot, and return to full hip extension. If you hinge forward slightly at the hips, you create more of a sprinter lunge position. This increases the loading on the glutes and hamstrings. The lean should come from the hips rather than rounding the lower back. The right torso angle depends on whether you want to emphasize the anterior or posterior chain. Step 5 of this lunge form breakdown is selecting the right weight: The way you load the exercise should match your torso position. For a glute and hamstring focused lunge with a forward lean, dumbbells held at your sides are a great choice. They let you hinge without forcing the weight away from your body or stressing your lower back. For a more upright, quad focused lunge, you can use dumbbells, a barbell across your back, or a weight held in a goblet position. The implement should support the mechanics of the variation instead of fighting against them. Step 6 of this lunge tutorial is knowing how deep to go: A full-depth lunge allows the back knee to descend toward the floor while the front foot stays planted and the torso remains controlled. The back knee can lightly touch, or kiss, the ground, but it should never crash into it. Control the descent and use the contact only as a depth reference. Your range of motion may be limited by your hips, calves, Achilles tendon, or ankle mobility. If tightness prevents you from reaching the floor without losing position, stop at the deepest range you can control. Do not pitch your torso forward just to look like you reached greater depth. Work within the mobility you have and improve it over time. Now that you know how to do lunges correctly, you can build stronger legs while avoiding the mistakes that commonly lead to knee pain and poor balance. Step backward and slightly outward, control the descent, choose the right torso angle. For step-by-step programs that show you how to perform every exercise correctly, head to athleanx.com and use the program selector to find the ATHLEAN-X training system that matches your goals. For more how-to's and tutorials, be sure to subscribe to this channel here on YouTube and remember to turn on your notifications so that you never miss a new video when it's published.

1 month ago·youtube.com
+41
How Ripped Can I Get My Brother In 100 Days?

How Ripped Can I Get My Brother In 100 Days?

Get the Min-Max training programs here: Phase 1: https://jeffnippard.com/products/the-min-max-program Phase 2: https://jeffnippard.com/products/min-max-program-phase-2 Together, that's more than 5 months of low volume, high intensity workouts! Use code YOUTUBE20 to get 20% off. ── Download MacroFactor Nutrition 2 weeks free: https://bit.ly/jeffmacrofactor (use code JEFF) Download MacroFactor Workouts 2 weeks free: https://bit.ly/jeffmacrofactorworkouts (use code JEFF) ── In this video, my brother, Brad, completes a 100 day fat loss journey, attempting to get to 19% body fat. I didn't want him to do his first cut alone, so I joined him, setting my goal at 9% body fat! ── References: High vs Low Meal Frequency: https://pubmed.ncbi.nlm.nih.gov/40169355/ https://pmc.ncbi.nlm.nih.gov/articles/PMC3374835/ Testosterone Reference Range: https://pmc.ncbi.nlm.nih.gov/articles/PMC5460736/ Diet Breaks: https://pubmed.ncbi.nlm.nih.gov/38193357/ https://pubmed.ncbi.nlm.nih.gov/28925405/ https://pubmed.ncbi.nlm.nih.gov/33587549/ https://pubmed.ncbi.nlm.nih.gov/12582226/ https://pmc.ncbi.nlm.nih.gov/articles/PMC10170537/ ── Produced by Bradley Nippard, Jeff Nippard and Bailey Wood Editing - Cat Senior Graphics - Cat Senior, Jim Pitts, Ishaan Mahtani, Mikhail Zariatskii Sound Editor - Iain Toms Assistant Editors - Fiyin Coker, Juampa Galarza ── About me: I'm a Canadian natural pro bodybuilder and internationally-qualified powerlifter with a BSc in biochemistry/chemistry and a passion for science. I've been training for 18 years drug-free. I'm 5'5 and fluctuate between 160 lbs (lean) and 180 lbs (bulked). ── Disclaimers: Jeff Nippard is not a doctor or a medical professional. Always consult a physician before starting any exercise program. Use of this information is strictly at your own risk. Jeff Nippard will not assume any liability for direct or indirect losses or damages that may result from the use of information contained in this video including but not limited to economic loss, injury or illness.

1 month ago·youtube.com
+30
What If You Never Take Rest Days? [EXPERIMENT]

What If You Never Take Rest Days? [EXPERIMENT]

Start a free two-week trial of BWS+ here: https://bws.plus/22a If you've wondered how often to train muscle groups per week, you've heard it: train hard, then take rest days — 48 to 72 hours — for repair and growth. That's the logic behind best training frequency advice, and why choosing to train everyday risks overtraining. But some people do demanding physical work daily and still build unusually muscular bodies. Could removing rest days actually help a muscle grow faster? Could that be the best workout split and best workout routine to build muscle? Follow Dr. Eric Helms: https://www.instagram.com/helms3dmj/ View Dr. Eric Helms Products: Monthly research reviews: www.massresearchreview.com His Latest Books: www.muscleandstrengthpyramids.com To find out, I recruited three participants for a 30-day experiment. Brandon trained his chest, Max trained one leg, and Yolinda her biceps and triceps. Brandon did five sets of 8-12 reps a day; Max did four sets of 9-12. The everyday side did about 35 hard sets a week versus roughly 10 on the other side. All three got baseline and follow-up MRI scans. At first, Max's everyday leg got extremely sore, Yolinda felt clear fatigue in her everyday arm, and fitting in a daily workout was its own challenge. Training creates high tension in muscle fibers — a powerful growth signal that also leaves the muscle temporarily weaker while it repairs. That's why most programs leave a day or two between hard sessions for the same muscle. But soreness doesn't perfectly tell you whether a muscle is actually ready to perform again. Dr. Eric Helms explained that DOMS usually peaks a day or two after training, while force production recovers on a different timeline; a muscle can feel sore even after its strength is back near baseline. Around day eight, Max noticed his soreness had suddenly started fading: the repeated bout effect, where repeated exposure to a muscle-damaging activity drastically reduces damage and soreness over time. The participants adapted, and despite occasional bad workouts, strength on the everyday side kept climbing. The bigger concern was overtraining joints and tendons. That's why everyone rotated exercises instead of repeating the same movement, and why Max lightened his load and paused one exercise for a few days. All three finished injury-free. The everyday side also did far more weekly volume. More hard sets tends to mean more growth, but most people can't cram 30-plus quality sets into one workout. Daily training spread that volume across seven smaller doses, suggesting the higher weekly volume — not frequency alone — was likely a major reason for the extra growth. At the final strength test, Yolinda was consistently curling 15s, and her everyday biceps and triceps out-performed her regular side by three reps. Brandon felt strong on his everyday side too, and all three finished with a clear strength edge on the daily-trained side. But strength alone couldn't prove more muscle had grown. That's why the MRI scans mattered: everyone took three rest days first to rule out swelling skewing results, and researcher Daniel Plotkin analyzed them blind, without knowing which side was which. Yolinda's normally trained arm grew about 1% versus 3% on her everyday arm. Max's normally trained leg showed about 0% growth versus roughly 2-3% on his everyday leg. Brandon saw about 5% growth on his normally trained chest versus about 20% on his everyday side. His everyday triceps also looked bigger, although they weren't formally measured. These results don't fully answer how often to train muscle groups per week for everyone. The practical takeaway isn't necessarily to train everyday; a smarter option is a temporary specialization cycle: pick one or two muscles to prioritize, keep the rest of your program at baseline, and train the priority muscle first whenever you're already in the gym, for two or three hard sets. One rule: don't hammer the same exercise every time. Pick two movements per muscle and rotate them to avoid stressing the same tendons. Disclaimers: Jeremy Ethier is not a doctor, physical therapist, or a medical professional. Always consult a physician before starting any exercise program. Use of this information is strictly at your own risk. Jeremy Ethier will not assume any liability for direct or indirect losses or damages that may result from the use of information contained in this video including but not limited to economic loss, injury, illness or death. 0:00 -1:31 The 30 Day Experiment 1:32 - 2:12 Do You Need Rest Days? 2:13 - 4:59 Soreness And Growth 5:00 - 6:03 Strength Gains 6:04 - 7:28 Potential Injuries 7:29 - 8:44 Day 30 Strength Test 8:45 - 11:59 Day 30 Muscle Results 12:00 - 13:10 How to Apply This

1 month ago·youtube.com
+42
The ONLY 2 Ab Exercises You Need

The ONLY 2 Ab Exercises You Need

If you want visible, well-developed six pack abs, you do not need an endless list of ab exercises. You need to train the abs through the two primary movement patterns that matter most and choose exercises that match your current strength level. GET A FLAT STOMACH IN 22 DAYS (FREE) - https://www.athleanx.com/flatstomach In this ATHLEAN-X Short, Jeff Cavaliere explains why just two exercises for abs can be enough to build a stronger, more defined midsection. The key is selecting one top-down ab exercise and one bottom-up ab exercise. Together, these movements train the rectus abdominis by bringing the chest toward the pelvis and the pelvis toward the chest. Top-down ab exercises emphasize the portion of the movement where the rib cage moves toward the pelvis. Bottom-up exercises reverse the action by bringing the pelvis toward the chest. Training both directions gives you a more complete ab workout without wasting time on dozens of random exercises. Your exercise choices should also reflect your ability level. An exercise that is too easy will not provide enough overload, while one that is too advanced may cause you to lose control and compensate with other muscles. Start with the variation you can perform correctly, then progress as your abs become stronger. BOTTOM-UP AB EXERCISES Beginner: Reverse corkscrew with bent knees Intermediate: Reverse corkscrew with straight legs Advanced: Hanging corkscrew TOP-DOWN AB EXERCISES Beginner: Upper circle crunch Intermediate: Power over Advanced: Cable crunch pulldown Choose one exercise from each category and perform 2 to 3 hard sets of each. Focus on controlled repetitions, a strong abdominal contraction, and taking the target muscles close to failure. Avoid rushing through the reps or turning the movement into momentum-based hip flexor work. This approach works because effective six pack exercises do not need to be complicated. Your abs respond to tension, progressive overload, proper exercise selection, and consistent effort just like every other muscle group. As your strength improves, move to a harder variation so the workout for abs continues to produce results. Of course, no ab workout can reveal a six pack if body fat levels remain too high. You can build stronger abdominal muscles through training, but getting a flat stomach and making those abs visible also requires nutrition that supports your goal. That usually means maintaining an appropriate calorie intake, eating enough protein, and staying consistent long enough to reduce excess body fat. You cannot out-train a consistently poor diet. The most effective plan for anyone wondering how to get abs combines direct ab training with smart nutrition, resistance training, and enough daily activity to support fat loss. The exercises build the muscle. Your overall diet and training plan determine how clearly that muscle can be seen. So, how many exercises do you need for a six pack? Start with two. Pick one top-down movement and one bottom-up movement, use the variation that fits your ability, and train each with purpose. When those exercises become too easy, progress to the next level rather than adding more low-quality volume. Whether your goal is six pack abs, 6 pack abs, a flatter stomach, or simply a stronger core, the answer is not doing hundreds of careless crunches every day. It is choosing better ab exercises, performing them with control, progressively challenging the muscles, and supporting your training with a nutrition plan that keeps body fat in check. For more videos on how to get six pack abs, build muscle, improve exercise technique, and train like an athlete, subscribe to ATHLEAN-X and turn on notifications so you never miss a new workout or training tip. You can subscribe to this channel here - http://bit.ly/2b0coMW Get Your Free "22 DAYS TO A FLAT STOMACH" Workout Plan: 📝 https://www.athleanx.com/flatstomach Connect With Me: 👉 https://www.instagram.com/athleanx For complete step-by-step workout programs, head on over to athleanx.com and make sure to use the program selector to find the training plan that is best suited to your personal goals. Jeff Cavaliere MSPT, CSCS served as both the head physical therapist and assistant strength coach for the New York Mets. Jeff earned his Masters of Physical Therapy and Bachelor’s of Physioneurobiology from the College of Health Sciences University of Connecticut Storrs. He is a certified Strength and Conditioning Specialist by the National Strength and Conditioning Association (NSCA).

1 month ago·youtube.com
+50
Get Bigger Arms in 22 Days (GUARANTEED!)

Get Bigger Arms in 22 Days (GUARANTEED!)

Build Bigger Arms Here - https://athleanx.com Subscribe to this channel here - http://bit.ly/2b0coMW Want to know how to get bigger arms in just 22 days? In this ATHLEAN-X arm workout, Jeff Cavaliere lays out a step-by-step plan to help you build bigger biceps, bigger triceps, and more noticeable arm size without adding a full arm day to your weekly split. Building big arms takes more than doing endless curls and triceps extensions. You need the right exercises, enough training frequency, progressive overload, and quality repetitions that place tension on the muscles you are trying to grow. This 22-day bigger arms workout trains the biceps and triceps three times per week with short sessions that can be added to the end of your current workouts. If you are following a total-body routine, push pull legs split, upper lower split, or bro split, keep your compound exercises. Simply remove your existing direct biceps and triceps work and replace it with the exercises shown here. Start by measuring your flexed arm around the highest point of the biceps and thickest portion of the triceps. Record it on day one, then repeat the measurement under the same conditions on day 22. The first biceps exercise is the incline dumbbell waiter curl. Keeping the top of the dumbbell level limits unwanted shoulder involvement and keeps tension on the biceps near the top of the rep. Perform four sets of nine reps. In week two, add three pulses to every rep. In week three, increase that to six pulses. These contractions improve the mind-muscle connection and make the shortened position more demanding. The first triceps exercise is the bench dip, performed for four sets to technical failure. Turn the hands slightly outward on the bench to encourage a safer shoulder position, lower under control, and finish every rep by fully extending the elbows. Add three pulses at lockout during week two and six pulses during week three to increase the time under tension. To build more width through the upper arm, the next biceps exercise targets the brachialis. The alternating cross-body hammer curl uses a neutral grip and brings the dumbbell across the body, forcing the brachialis to work harder. Begin with four sets of 12 reps per arm. In week two, add five pounds and use rest-pause training to complete all 12 reps. In week three, add another five pounds and finish the target reps with good form. For the medial head of the triceps, choose either the triceps pushdown or the thumbs-up dumbbell bench press. Both emphasize complete elbow extension, which is often missing from poorly performed triceps workouts. On pushdowns, allow the wrists to extend naturally so the forearms do not dominate the exercise. On the dumbbell press, keep the elbows close and drive the thumbs upward as you reach full lockout. Add five pounds in week two and another five pounds in week three, using rest-pause as needed to reach 12 quality reps. The final biceps and triceps sessions focus on eccentric overload, an effective way to increase mechanical tension and stimulate muscle growth. For biceps, use the cheat curl. Apply only enough momentum to bring the weight to the top, then make the biceps control the lowering phase for three seconds. The next week, extend the eccentric to four seconds. During the final week, begin with five-second negatives, then reduce to four seconds and three seconds as fatigue builds. For triceps, perform the PJR pullover. Use the lats to help return the dumbbell to the starting position, but make the long head of the triceps control the slow lowering and stretch behind the head. The eccentric progresses from three seconds to four seconds, then to a final five-, four-, and three-second sequence during the last week. This big arms workout combines frequency, focused volume, progressive overload, rest-pause training, and controlled eccentrics. Instead of training biceps and triceps once per week, the work is spread across multiple sessions with recovery between them, giving you more opportunities to stimulate stubborn arm muscles. Follow the 22-day schedule, keep your form strict, and do not add excessive junk volume. The goal is to make every curl, press, dip, pushdown, and pullover count. On day 22, measure your arms again and compare the result with your starting number. Share your arm gains in the comments and challenge a training partner to complete the full arm workout with you. If you are looking for a complete workout plan to build muscle, get stronger, and develop an athletic body from head to toe, visit ATHLEANX.com and use the program selector to find the best training program for your goals. For more videos on how to get bigger arms, how to build big biceps, how to build big triceps, the best arm exercises, and complete biceps and triceps workouts, subscribe to ATHLEAN-X and turn on notifications so you never miss a new video.

1 month ago·youtube.com
+32
What ACTUALLY Gets You Lean (Stop Messing This Up!)

What ACTUALLY Gets You Lean (Stop Messing This Up!)

If nutrition keeps tripping you up… if you feel like you can train hard but can’t stay consistent with your diet… then this is the video you need to watch. Because the truth is — you haven’t failed your diet. Your diet has failed you. Get the Flex Factor Meal Plan - https://athleanx.com And I’m going to show you exactly why. In this video, I’m breaking down one of the biggest lies in fitness — the idea that you need to follow a rigid, perfect, all-or-nothing meal plan to get lean, build muscle, and stay that way. That’s exactly why most people never make it. They fall off before they ever give themselves a real chance to succeed. Here’s the reality: Almost 80% of your ability to stick to a nutrition plan comes down to what happens in the FIRST 10 DAYS. And most people never even make it there. Why? Because they think they have to be perfect. Perfect food choices.Perfect timing.Perfect portions. And the moment something doesn’t go exactly as planned… they quit. That’s the mistake. Because when you actually understand how nutrition works — and how flexible it really is — everything changes. In this video, I show you: • Why nutrition—not training—is the biggest driver of fat loss • How to set your protein intake correctly based on your goal (fat loss, muscle gain, or maintenance) • Why most diet plans fail due to perceived rigidity—not actual requirements • How to use a simple plate division method to build meals that work anywhere, anytime • Why swapping foods like rice, pasta, potatoes, or vegetables doesn’t matter nearly as much as you think • How to adjust portion sizes to account for calorie differences in protein sources like chicken, steak, and salmon • Why fibrous carbs are almost calorically irrelevant—and stressing over them is killing your consistency • How to structure your eating around your real life schedule (not someone else’s unrealistic plan) • The truth about intermittent fasting, meal timing, and eating frequency • And most importantly… how to create a plan you can actually stick to long enough to make it automatic. Because that’s the goal. Not perfection. Consistency. Once you understand this, you stop starting over. You stop “falling off.” You stop thinking you need a new diet every 2 weeks. And you finally build something that lasts. I’ve done this for over 17 years — not just for myself, but for elite athletes, actors, and everyday people who needed real, sustainable results. And the ones who succeed? They’re not the most disciplined. They’re the ones who stop chasing perfection… and start building consistency. If you can get through the first 10 days — you’re closer than you think. Most people quit on the 1-yard line. Don’t be one of them. If you’re ready to stop overcomplicating your nutrition and finally take control of it, this video will show you how. And if you want a system that adapts to YOU — your schedule, your preferences, your goals — I built something called the Flex Factor Meal Plan to do exactly that. But even if you never use it… Everything you need to succeed is already in this video. Watch it. Apply it. And give yourself the chance to finally get this right. If you know someone struggling with their nutrition, share this with them. Subscribe for more science-based training and nutrition videos that actually work. And for step-by-step programs and tools, head to ATHLEANX.com.

4 months ago·youtube.com
+47
If You Can't Do This, You're Not Fit (Even If You Look It)

If You Can't Do This, You're Not Fit (Even If You Look It)

Start a free two-week trial of the BWS+ App: https://bws.plus/16a Watch us test every cardio exercise for fat loss: https://youtu.be/Fz89dJTZsko What does healthy aging look like? How do you know if you’re aging well? Mariana is almost 60 and can still pull herself up with just three fingers. Melinda is 61 and has never touched a weight. Both faced 7 science-backed fitness tests, including the sit to stand test, alongside younger participants — each worth 1 point for baseline, 2 for advanced — to find out what age and lifestyle really do to the body. We’ll also learn how to optimize your performance on these tests for longevity’s sake. The broad jump tests lower body power, one of the first qualities to decline from ageing. Baseline: jump your own height if younger, at least half your height if over 55. Advanced is 2 meters for women and 2.5 for men. Ravin does not train at all but passed at 29. Yash passed. Melinda barely cleared the minimum. Mariana, at nearly 60, came much closer to the younger men. To improve: jumps, sprints, or kettlebell swings. Beginners start with a goblet squat. The reverse lunge tests single-leg strength and stability. Baseline is 8 reps with 25% of body weight in each hand, both sides. Advanced is 8 Bulgarian split squats with 50% for men and 30% for women. Melinda was out in less than a rep. Ravin lasted a little longer with poor form. Yash and Mariana both passed the baseline, but the advanced test split them: Yash had strength but not stability. Mariana passed. Bilateral lifts let the stronger leg quietly do more work, hiding imbalances that single-leg tests expose — gaps that tend to widen with age. Progression for healthy aging: stationary split squats, reverse lunges, Bulgarian split squats. The chin-up tests whether you’re aging well by determining if the upper body can pull its own weight. Baseline for men is 1 clean rep. Advanced is 3 weighted reps at 50% body weight for men, or 5 clean bodyweight reps for women. Ravin and Melinda both failed. Yash cleared the baseline and nearly reached the advanced mark at around two and a half reps. Mariana cleared the women's advanced range and kept going — finishing with a three-finger pull-up at nearly 60. She climbs regularly and her DXA showed around 17% body fat, exceptionally lean for her age. Path: inverted rows, band-assisted reps, lighter bands, unassisted, then weighted. The one-mile run estimates cardiovascular fitness. Baseline is under 10 minutes if younger, under 12 if over 55. Advanced is under 7 minutes and 9 minutes or less respectively. Ravin burned out early; Yash nearly hit the advanced time from a running and sports base maintained without direct cardio. Mariana was the only one to beat the advanced benchmark for her age. Low cardio fitness carries risk comparable to high blood pressure and diabetes, and declines roughly 1% per year after your mid-20s. Melinda and Ravin both had alarmingly high visceral fat on their DXA scans. Mariana had almost none. Start with challenging walking intervals, then build toward running, cycling, swimming, or sport. The wall mobility test checks the shoulders and upper back, which is often tight from sitting and poor posture. Stand a foot from a wall with glutes and upper back against it, raise arms to a goalpost position, and keep the head touching without arching the back or flaring the ribs. The problem is pressing muscles overpowering the mid and lower traps, driving upper back rounding that raises fracture and injury risk with age. Fix: over-and-backs with a band or towel, then wall slides, done daily. This can help fix rounded shoulders and other posture issues as well as neck pain and shoulder pain. The roll-down test assesses core strength through controlled repetitions. Baseline is 25, advanced is more than 50. A weak core hurts posture, balance, and back health — visible abs are a separate matter, driven mainly by body fat, roughly 15% for men and 25% for women. Most participants finished quickly. Mariana kept going and showed part of her routine, starting with a 45-pound plate. To improve core strength, the best core exercises are progressing with the roll-downs, then progress to RKC planks, ab rollouts, and weighted crunches. The sit-to-stand test is the most predictive of the group for longevity: sit on the floor and stand back up without using hands, knees, or support. In a study of roughly 2,000 adults aged 51 to 80, poor scorers were 5 to 6 times more likely to die over the following six years. Progression hip stretches for hip mobility: 90/90 hip stretch, unsupported transitions, windshield-wiper leg movements, full get-up. 0:00 - 0:38 What We're Testing 0:38 - 4:31 Test 1 4:40 - 7:55 Test 2 8:18 - 12:15 Test 3 12:21 - 17:42 Test 4 17:43 - 20:10 Test 5 20:11 - 23:15 Test 6 23:16 - 26:22 Test 7 26:23 - 26:57 How You Rank

4 months ago·youtube.com
+32
How to ACTUALLY Lose Stubborn Belly Fat (NO B.S!)

How to ACTUALLY Lose Stubborn Belly Fat (NO B.S!)

If you’re trying to lose stubborn belly fat but nothing seems to work, then this is a video you can’t afford to skip. In this video, I’m going to walk you through 4 brutally honest questions that most people avoid answering—but until you do, that fat around your waist isn’t going anywhere. Answer them truthfully, and you’ll finally unlock what’s been holding you back from getting lean. FREE TOTAL BODY WORKOUT HERE - https://athleanx.com/tbfree SUBSCRIBE TO THIS CHANNEL HERE - https://bit.ly/2b0coMW Here’s the reality. Losing fat is both incredibly simple and frustratingly difficult at the same time. The science behind fat loss is clear and has been for decades. The problem isn’t knowing what to do—it’s consistently doing it well enough for long enough to see results. And that’s where most people fall apart. So before you start blaming genetics or calling your belly fat “stubborn,” you need to take a hard look in the mirror. Not to judge how you look—but to honestly evaluate what you’ve been doing. The first question you have to ask yourself is this: is your belly fat actually stubborn…or is your overall body fat still just too high? Because those are two completely different situations. If you’re still carrying a higher body fat percentage overall, then the issue isn’t stubborn fat—it’s inconsistency. Tightening up your habits will get you moving in the right direction fast. But if you truly feel like you’re doing everything right and still can’t get rid of that last layer, then we have to dig deeper. That’s where these next questions come in. Let’s start with alcohol. I get it—this isn’t just about drinking for the sake of it. It’s social. It’s part of how people relax and connect. But you can’t ignore what it does. Liquid calories add up quickly, and alcohol directly interferes with your body’s ability to burn fat efficiently. That doesn’t mean you can never drink—but it does mean you need to decide what matters more to you. Getting lean…or maintaining that habit. There’s no right answer—but there is an honest one. Next comes nutrition. And this is where most people think they’re doing better than they actually are. Fat loss requires a calorie deficit. There’s no way around that. But how you create that deficit matters. Extreme diets, cutting out entire food groups, or trying to crash your way lean almost always backfire. If you believe you’re in a deficit and still not losing belly fat, then you need to break this down further. First—how clean is your diet, really? Not what you think it is, but what it actually is. If that checks out, then look at your portions. Because even clean food in the wrong amounts will stall progress. And if that still isn’t the issue, then you’re left with one final truth—your consistency isn’t where it needs to be. This is where cheat meals quietly turn into cheat days…or worse. From there, we have to look at your training. Because diet alone will never be enough if your goal is to get lean and stay lean. You need to train—and not just with endless cardio. You need resistance training to build muscle. Muscle is what drives your metabolism higher and allows your body to burn more calories even at rest. A solid plan should include weight training at least 3 to 5 times per week, with an emphasis on intensity and total workload. Adding in things like barbell complexes can help you increase calorie burn while still building athletic, functional muscle. And finally, we come to ab training. Not because it’s going to magically burn belly fat—it won’t. But because developing your abs creates a visual payoff that reinforces everything else you’re doing. When you start to see those muscles come in, it builds momentum. And momentum is what keeps you consistent. At the end of the day, getting rid of belly fat isn’t about secrets or shortcuts. It’s about honesty. Brutal honesty. Once you identify where you’re falling short, you can fix it—and when you fix it, the results follow. If you’re looking for a step-by-step program that takes all of this guesswork out and shows you exactly how to train and eat to lose belly fat, build lean muscle, and get in your best shape ever, head to athleanx.com and find the program that matches your goals. And if you want more videos that break down fat loss, ab training, and performance the right way—make sure you subscribe to the channel, turn on notifications, and never miss a new video when it drops.

4 months ago·youtube.com
+42
How to Make Pullups MUCH Easier

How to Make Pullups MUCH Easier

If you think a handful of pull-ups makes you strong… it might be time to rethink your standards. In this video, I’m breaking down why pull-ups are one of the most brutally honest tests of upper body strength—and why so many people struggle with them despite training consistently. The issue isn’t effort. It’s what you’re training—and what you’re leaving out. Most people overemphasize pressing movements like bench press and shoulder work while neglecting the muscles that actually drive pulling strength. Without strong scapular control, a developed upper back, and proper arm involvement beyond just biceps and triceps, your strength won’t carry over to the bar. That’s why pull-ups expose everything: Weak lats Poor scapular function Imbalances from years of bad posture Gaps in real pulling strength On top of that, pull-ups are a direct reflection of your strength-to-weight ratio. The more non-contributing mass you carry, the harder every rep becomes. But being under-muscled creates the same issue—you simply don’t have the force production to move your body efficiently. This is what makes pull-ups such a powerful benchmark: They don’t reward shortcuts They don’t hide weaknesses They don’t lie about your strength Whether you’re trying to get your first rep or increase your total, improving your pull-ups requires building real, transferable strength through proper training—not just doing more reps. If you want to improve your upper body strength, fix muscle imbalances, and start performing pull-ups the right way, you need a plan that addresses the entire chain involved in the movement. For more tips on building muscle, correcting posture, stretching, and chronic aches and pains, be sure to stay tuned to this channel and remember to subscribe so you never miss another video from a physical therapist with a pro sports background as a PT and strength coach. You can subscribe to this channel here - http://bit.ly/2b0coMW Get Your Workout & Meal Plan: 📝 https://www.athleanx.com Connect With Me: 👉 https://www.instagram.com/athleanx For complete step-by-step workout programs, head on over to athleanx.com and make sure to use the program selector to find the training plan that is best suited to your personal goals. Jeff Cavaliere MSPT, CSCS served as both the head physical therapist and assistant strength coach for the New York Mets. Jeff earned his Masters of Physical Therapy and Bachelor’s of Physioneurobiology from the College of Health Sciences University of Connecticut Storrs. He is a certified Strength and Conditioning Specialist by the National Strength and Conditioning Association (NSCA).

4 months ago·youtube.com
+44
The #1 Workout That GREW My Shoulders (EVEN AT 50!)

The #1 Workout That GREW My Shoulders (EVEN AT 50!)

If you want wider shoulders fast, this is the exact shoulder workout that made the biggest difference for me. Most people train shoulders hard, but their shoulders never actually get wider. That’s because most shoulder workouts are built around effort instead of execution. They rely on pressing movements. They rush through reps. They use momentum instead of control. And the result is a shoulders workout that builds fatigue, not width. If your goal is to build bigger shoulders, broader shoulders, and that capped look that makes your upper body stand out, then your shoulder workout has to change. This isn’t just another workout for shoulders. This is about understanding how to actually target the lateral delts, because that is the muscle responsible for shoulder width. In this shoulder workout, I break down the exact method that helped me grow my shoulders faster, and how you can apply it to your own training immediately. Because here’s the problem… Even when people try to train side delts, they still turn it into the wrong movement. They turn lateral raises into front raises. They let their traps take over the lift. They swing the weight instead of controlling it. They lose tension where it matters most. So even though they’re doing a shoulder workout, they’re not actually training the muscle that creates width. That’s why their shoulders don’t grow. And that’s why most shoulders workouts fail. In this video, you’re going to see: The best shoulder workout approach for building width How to properly perform lateral raises for maximum delt activation The biggest mistakes in most shoulder workouts that limit growth How to structure your shoulders workout for better results The key adjustments that make your shoulder exercises actually work How to get more out of every rep in your shoulder workout If you’ve been searching for how to get wider shoulders, how to get bigger shoulders, or the best shoulder workout for size and width, this is where you fix it. Because once you understand how to control the movement and keep tension on the lateral delts, everything changes. You’ll feel it immediately in your shoulders workout. And over time, you’ll start to see the difference in your shoulder width, your shape, and your overall physique. Wider shoulders make your entire upper body look bigger and more athletic. They create the illusion of a smaller waist. They improve your proportions. They give you that broad, powerful look. But it only happens if your shoulder workout is built correctly. Not just more volume. Not just heavier weights. Better execution. If your current shoulder workout or shoulders workout routine isn’t giving you the results you want, then it’s time to fix how you’re training. This is the workout for shoulders that actually delivers width. Not hype. Not guesswork. Real results. If you want a complete step-by-step program that builds this into your training, head to athleanx.com and find the best program for your goals. Every ATHLEAN-X shoulder workout is designed to help you build muscle, increase strength, and improve movement at the same time. Whether your goal is size, strength, or aesthetics, your shoulders workout has to be built with intention. This is where you start. Subscribe to the channel here: http://www.youtube.com/user/JDCav24?sub_confirmation=1 Turn on notifications so you never miss a new shoulder workout, shoulders workout, or workout for shoulders again.

4 months ago·youtube.com
+38
It's Tough, But It Gets You Abs In 60 Days

It's Tough, But It Gets You Abs In 60 Days

Try 2 weeks free of the BWS fitness app here: https://bws.plus/15a Most people underestimate how much fat they actually need to lose before their abs start to show. Luke guessed he was somewhere in the low-to-mid 20s for body fat, but started at 29.2%. Nicole guessed 23%, but started at 33%. For men, getting abs usually doesn’t happen until below 20% body fat, with a fuller six-pack often showing up around 15% and below. For women, the comparable sweet spot for their abs journey is usually between about 25% and 18%. Because most people misjudge where they are starting, their six pack transformation can easily take anywhere from around 6 months to over a year instead of the popular claim of “abs in 90 days”. Based on Luke’s starting point, getting down to 20% body fat meant losing about 20 pounds of pure fat. If you want to lose fat while keeping muscle, the sweet spot is about 0.5% to 1% of body weight per week. A moderate pace would sit around 0.7% per week, but here the target was pushed to 0.9% per week. For Luke, that worked out to about 1.5 pounds of fat loss per week, which would put 20% body fat at roughly 90 days and 15% at about 140 days. If muscle is built while dieting, body fat percentage can drop even faster, making visible abs possible in as little as 60 days. The same framework was applied to Nicole using her own numbers. The rough timelines are longer than most people expect. But it’s possible to speed it up with three things. First was diet. Instead of simply slashing calories, the focus was on food choices that made the deficit more manageable. Luke’s intake was set at 2,000 calories per day, creating about a 500-calorie deficit from diet alone, while Nicole’s was set at 1,600 calories, giving her about a 300 to 400 calorie deficit. Because both of them worked rotating shifts, the plan also had to include quick snacks and desserts that were satisfying enough to reduce hunger, even though hunger was still part of the abs journey process. Second was full-body strength training. Strength training helps tell the body to keep muscle and burn more fat instead. But training abs alone is not enough. You need to train the whole body. Third was cardio. Walking was used instead because it is low effort, easy to recover from, and easier to stay consistent with. Luke and Nicole were averaging about 5,000 steps per day, and the goal was to push that to 10,000, which was expected to increase daily calorie burn by roughly 200 calories to help them in their six pack transformation. Sleep became another major factor in getting abs. Research comparing an 8-hour sleep group to a sleep-deprived group sleeping only 5.5 hours per night found that both groups lost a similar amount of total weight in a calorie deficit, but in the better-rested group, roughly half the weight lost came from fat. In the sleep-deprived group, 75% came from lean mass, with fat loss cut in half. By 6 weeks, both had made serious progress. Looking at more than 18,000 DXA scans showed that men store more fat in the midsection, while women tend to store more stubborn fat around the hips and thighs. On day 1, Luke’s belly fat was more than 7% higher than the rest of his body, while Nicole’s belly fat was almost identical to her total body fat. That helps explain why women can sometimes achieve a flatter stomach earlier, even if men may have the advantage later when it comes to abs that really pop, since men carry more muscle mass on average. At the 45-day check-in, Nicole’s waist had dropped from 72.5 cm to 66 cm, while Luke’s dropped from 85 cm to 78 cm. But the final stretch was the hardest. The leaner they got, the more hunger, fatigue, irritability, stress, bloating, and water retention pushed back. At very lean levels, pushing harder by cutting calories further or training more can make things worse. That is also why the fastest way to get abs is not always the best. Since more than 80% of dieters who successfully lose fat do not keep it off, the final phase focused on maintenance instead of continuing to push weight lower. Nicole added back about 300 to 400 calories, Luke added back about 500, and the goal shifted toward stabilizing body weight while keeping the key habits in place. After 120 days, Luke had gone from 29.2% body fat to 15.6%, losing 25 pounds of fat while gaining 5 pounds of lean mass. Nicole went from 33% to 19.5%, losing 20 pounds of fat while gaining 3 pounds of lean mass. Their strength improved too, with Luke going from 40 to 63 push-ups and from 14 to 21 pull-ups, while Nicole went from 4 to 18 push-ups and from 3 assisted pull-ups to 8 unassisted. The bigger takeaway is not that everyone can get abs in 60 or 90 days. It is that the timeline depends on starting body fat, how well muscle is preserved, and whether the process is structured well enough to stick to all the way through.

4 months ago·youtube.com
+41
How Fit Are You REALLY??

How Fit Are You REALLY??

Everyone thinks they're fit until they actually have to prove it. In this video, I break down the ultimate fitness test using real fitness benchmarks and standards to show you exactly where your overall fitness stands. If you've ever wondered how to be fit, how to get fit, how strong you should be, or how to improve your fitness, this is where you find out. FREE TOTAL BODY WORKOUT HERE - https://athleanx.com/tbfree SUBSCRIBE TO THIS CHANNEL HERE - https://bit.ly/2b0coMW These are not random exercises. Each test is designed to measure a critical component of overall fitness — including strength, stability, balance, mobility, and core strength. Together, they give you a complete picture of how fit you really are. And the good news? Every single one of these is trainable. That means every weakness you find here is fixable. TEST 1: SINGLE LEG WALL SIT The first test is the single leg wall sit — a measure of lower body strength, hip stability, and muscular endurance. The standard is 30 seconds per leg with your knee at 90 degrees and your back flat against the wall. If your hips shift, your knee caves, or you can't hold the full time, you have a stability deficit that directly impacts performance and injury risk. This is the same assessment used in sports physical therapy to evaluate ACL injury risk. TEST 2: WALL SPLAT TEST Next is the wall splat test — one of the most revealing mobility assessments you can perform. Stand with your toes close to the wall, arms overhead, and squat below parallel without losing position. To do this correctly, you need ankle mobility, hip mobility, thoracic extension, and overhead shoulder mobility — all working together. If your heels lift, your arms drop, or your lower back takes over, your mobility is directly limiting your strength and movement efficiency. TEST 3: HAND RELEASE PUSH-UP From there, we move into the hand release push-up — a true test of upper body strength, core stability, and muscular endurance. The standards are 40 reps for men in their 40s and 30 reps for women, with a gradual 5–10% decline per decade. If your hips sag, your range of motion shortens, or your tempo breaks down before you hit the mark, your strength and stability are not where they need to be. TEST 4: DEAD ARM HANG The dead arm hang is one of the best tests of grip strength, scapular stability, and total body control. The standard is 2 minutes for men in their 40s and 1 minute 15 seconds for women, with a one-second reduction per year after 40. Most people don't fail because their hands give out — they fail because their shoulders lose position and their core loses tension first. Grip strength is one of the most reliable predictors of long-term health outcomes, but this test shows far more than grip alone. TEST 5: SIDE PLANK LEG LIFT The side plank leg lift tests lateral core strength, hip abductor function, and the ability to resist movement under load. The standard is 30 seconds per side in perfect alignment — for all ages, men and women. If your hips drop, your torso rotates, or your top leg drifts forward to compensate, your lateral stability is breaking down. On this one, quality matters as much as time. Just making it 30 seconds does not mean you passed. TEST 6: THE OLD MAN TEST The old man test is one of the simplest yet most telling assessments in this entire lineup. Stand on one leg and put on your sock and shoe without letting your foot touch the ground — no wall, no grab, no reset. This tests single-leg balance, ankle stability, hip control, and proprioception. If you struggle here, it is not an age issue. It is a training issue. TEST 7: PULL-UPS The pull-up is the king of upper body pulling exercises and the ultimate test of strength relative to bodyweight. The standard is 15 clean, unbroken reps for men in their 40s and 7 for women — full extension at the bottom, chin clearly over the bar at the top, no kipping. If you cannot meet this standard, it exposes weaknesses in pulling strength, scapular control, grip endurance, and body composition all at once. These benchmarks are not meant to discourage you. They are meant to direct you. Every test points to something specific — a weakness you can address, a limitation you can improve, a gap you can close. When you close those gaps, you don't just get better at the test. You move better, feel better, and live better. If you are looking for a step-by-step workout program with a meal plan included, be sure to head over to athleanx.com and use the program selector to find the program that best matches your current training goal and ability levels. For more videos on building and improving your fitness, make sure to subscribe to this channel here on YouTube and remember to turn on your notifications so you never miss a new video when it’s published.

4 months ago·youtube.com
+37
How Good is Your Mobility REALLY?

How Good is Your Mobility REALLY?

Most people think they have good shoulder mobility… until they try THIS. The overhead wall slide looks simple, but it exposes a major weakness in your shoulder function; a lack of external rotation and proper scapular control. And without those, your overhead strength, stability, and even pain-free movement are limited. In this short, I’ll show you exactly how to perform the overhead wall slide the right way so you can activate your rotator cuff, improve shoulder mobility, and restore proper overhead mechanics. If your shoulders feel tight, stiff, or painful when lifting your arms overhead, this is the drill you need to start doing daily. Fix your shoulder function, and everything else: pressing, pulling, and even posture gets better. For more tips on building muscle, correcting posture, stretching, and chronic aches and pains, be sure to stay tuned to this channel and remember to subscribe so you never miss another video from a physical therapist with a pro sports background as a PT and strength coach. You can subscribe to this channel here - http://bit.ly/2b0coMW Get Your Workout & Meal Plan: 📝 https://www.athleanx.com Connect With Me: 👉 https://www.instagram.com/athleanx For complete step-by-step workout programs, head on over to athleanx.com and make sure to use the program selector to find the training plan that is best suited to your personal goals. Jeff Cavaliere MSPT, CSCS served as both the head physical therapist and assistant strength coach for the New York Mets. Jeff earned his Masters of Physical Therapy and Bachelor’s of Physioneurobiology from the College of Health Sciences University of Connecticut Storrs. He is a certified Strength and Conditioning Specialist by the National Strength and Conditioning Association (NSCA).

5 months ago·youtube.com
+47
Do This DAILY for A Flatter Stomach (GUARANTEED)

Do This DAILY for A Flatter Stomach (GUARANTEED)

If you want to know how to get a flat stomach, you’re probably thinking about diet, fat loss, and endless ab workouts… But what if I told you there’s a critical muscle you’re NOT training that directly controls how flat your stomach looks — no matter your body fat level? In this video, I’m going to show you exactly how to flatten your stomach by targeting the most overlooked abdominal muscle: the transverse abdominis. This is the muscle that literally pulls your waist inward and gives you that tight, flat stomach appearance — even before you lose a single pound of fat. Most people focus only on the six-pack (rectus abdominis)…But if you’re ignoring this deeper core muscle, you’re leaving a flatter stomach on the table. If your stomach still sticks out — especially your lower belly — it’s not always just body fat. It’s often because: • You can’t properly activate your transverse abdominis • Your abs are pushing OUT instead of pulling IN • You’ve never trained your core to function the way it’s designed to That’s why even people who do tons of crunches still struggle with how to get a flat lower belly. In this video, I’ll walk you through a simple 3-step method you can do every day: 1 Expand your rib cage and lift your chest 2 Fully exhale ALL the air out 3 Pull your belly button back toward your spine This creates a natural vacuum effect that trains your core to cinch your waist down. This is NOT just sucking in your stomach.This is true muscle activation that builds a tighter, flatter midsection over time. Once you learn how to activate this muscle, you need to apply it to: • Crunches • Planks • Standing ab exercises • Everyday posture This is where the real transformation happens. Because a flat stomach isn’t just about fat loss…It’s about how your muscles hold your body together. You can do this: • First thing in the morning • Before workouts • During your ab training • Even throughout the day Just a few minutes of this can start to change the way your waist looks and feels. If you want a complete program that shows you exactly how to train your abs for a flatter stomach, check out the full plan here: https://athleanx.com If you’re serious about learning how to get a flat stomach, how to flatten your lower belly, and how to build visible abs the right way, make sure you subscribe and turn on notifications so you never miss a video. how to get a flat stomachhow to get a flatter stomachhow to flatten your stomachhow to get a flat lower bellyhow to flatten lower bellyhow to get rid of lower bellyhow to shrink waisthow to tighten coretransverse abdominis exercisestomach vacuum exerciseflat stomach workoutlower belly fat exercise

5 months ago·youtube.com
0
The Fastest Way to Gain 20 lbs Of Muscle (Naturally)

The Fastest Way to Gain 20 lbs Of Muscle (Naturally)

Try 2 weeks free of your personalized fitness program here: https://bws.plus/14a Gaining 20 pounds of muscle can completely transform your body whether you start out skinny, skinny-fat, or overweight. But very few people ever build that much muscle naturally, not because of age or muscle genetics, but because they make some early progress in muscle building, get stuck, and spend years doing more workouts, eating more protein, and buying more supplements without following the right plan for building muscle long enough for it to work. The process comes down to three things that matter most for building muscle as fast as possible naturally: training, nutrition, and recovery. With proper training and nutrition, building 20 pounds of muscle takes at least a year, and gains slow down significantly after that. But your fastest progress happens when you start lifting properly. Research on top pro drug-tested bodybuilders who have built well over 20 pounds of muscle naturally found that they averaged only about 12 sets per muscle per week, and some muscle groups were trained with as few as 6 sets weekly. That sounds low until you understand diminishing returns. Effort matters just as much for muscle building. Training closer to failure appears to create a stronger growth stimulus than stopping well short of it. At the same time, trying to combine very high volume with failure-level effort on every set creates too much fatigue to sustain well. So the real goal is not to maximize everything at once, but to choose a training style that lets you push hard, recover, and stay consistent. Two practical approaches come out of that to build muscle. One is a lower-volume, higher-intensity method with around 5 to 12 sets per muscle per week and most sets taken to failure. The other is a higher-volume, moderate-intensity method with around 12 to 20 sets per muscle per week while stopping 1 to 3 reps short of failure. Both can work, which means preference and sustainability matter. Once you get to roughly 10 or 11 sets for one muscle in a single workout, more may not add much. Splitting those sets across at least two days per week may speed up growth, which is why upper/lower, push/pull/legs, and full-body splits can all work well if they fit your schedule. Exercise selection matters too, especially because the best exercise for one person can be the wrong one for someone else. Beginners do best focusing on a small number of general movement patterns like presses, pulls, squats, and hip hinges. Intermediates usually hit a point where standard compound lifts no longer grow every muscle equally, which is where more individualized choices and specialized exercises become important. Advanced lifters usually know which movements work best for their body and simply double down on them, rotating only when needed. Nutrition starts with calories, because how much you should eat depends on both your body fat level and your training experience. If you are above roughly 20% body fat as a man or 30% as a woman, you may be in a good position to recomp by losing fat while gaining muscle. In that case, you probably do not need a surplus to make excellent progress, but the deficit should stay moderate, with a rough cap of around 0.5% of bodyweight lost per week. Once you are leaner and muscle gain becomes the main goal, moving closer to maintenance or a surplus makes more sense. Calorie targets should also scale with training age, with bigger monthly weight-gain targets for beginners and smaller ones for advanced lifters. Protein matters, but less than most people think. A solid low-end target is around 1.6 grams per kilogram of bodyweight, or 0.7 grams per pound, but meaningful gains can still happen lower than that. One of the most overlooked nutrition factors for muscle building is what you eat before you train. Instead of obsessing over protein alone, it helps to have a meal with slow-digesting carbs and protein about 1.5 to 2 hours before training, then some faster-digesting carbs closer to the workout so you can actually perform hard enough to drive growth. Creatine has a strong track record, is cost-effective, and can add a small but consistent boost to lean mass and gym performance, especially early on. But most of that lean mass increase is a one-time effect from increased water in the muscle, and some people, due to muscle genetics, may not respond much because their creatine stores are already naturally saturated. The bigger point is that supplements are optional. Recovery matters just as much, and sleep sits at the center of it. Better sleep supports growth hormone and testosterone production, improves recovery, and affects what you can achieve in the gym. Practical fixes for sleep quality include eye masks, ear plugs, cooler room temperatures, and short naps. 0:00 - How Long It Takes 1:25 - Training 7:36 - Best Exercises 11:03 - Diet Plan 15:55 - Supplements 17:18 - Sleep

5 months ago·youtube.com
0

Actions